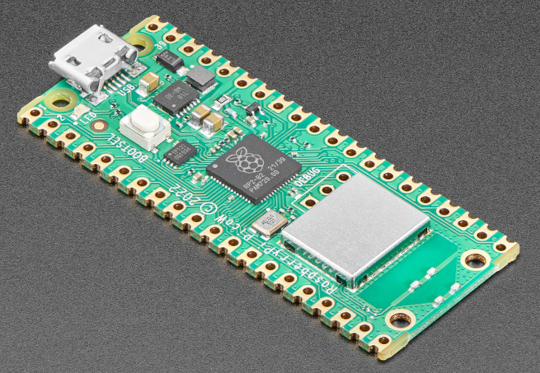
I’ve written a script in CircuitPython 8.2.6 running on a Raspberry Pi Pico W. The latest versions of both CircuitPython and MicroPython (from which CircuitPython is derived) has implemented Python’s async/await concurrent support, which I have used to great effect below.
The listing starts with “identifying” code that tells me what some of the Pico W’s resources are. You don’t need them for the async portions, but it comes in handy when I’m trying to debug or create new CircuitPython applications, and I believe you’ll find them as useful as I have.
One other feature I’ve used is the Python ‘f’ string to print formatted strings with data. It’s a feature that’s been in regular Python for a few years now, and it’s been copied over to MicroPython and CircuitPython for nearly as long.
What follows is the code listing, after which I describe various section functionalities.
import boardimport digitalioimport gcimport microcontroller as mcimport osimport sysimport time# Introduce yourself#print(f"\n{os.uname().machine}")print(f"{sys.implementation.name} v{'.'.join(map(str,sys.implementation.version))}")print(f"CPU clock: {mc.cpu.frequency:,} Hz")print("-------------------------------\n")# Show available memory#print("Memory Stats - gc.mem_free()")print(f"Free: {gc.mem_free():,} Bytes")print("----------------------------\n")# Show flash size#flash = os.statvfs('/')flash_size = flash[0] * flash[2]flash_free = flash[0] * flash[3]print("Flash Stats- os.statvfs('/')")print(f"Size: {flash_size:,} Bytes\nFree: {flash_free:,} Bytes")print("----------------------------\n")# Check local WiFi network#import wifinetworks = {}for network in wifi.radio.start_scanning_networks():if len(network.ssid) > 0 and network.ssid[0] != '\x00':networks[network.ssid] = networkwifi.radio.stop_scanning_networks()print("WIFI: SCAN, SORTED BY SSID")for ssid in sorted(networks):print(f"SSID: {ssid:<24}- RSSI: {networks[ssid].rssi}")import binascii as baNAME = os.uname().sysname.upper()UNIQUE_ID = ba.hexlify(mc.cpu.uid).decode('ascii').upper()HOST_NAME = NAME + "-" + UNIQUE_ID[-4:]print()print(f"Board SSID: {HOST_NAME}")print("----------------------------\n")# Check for any I2C devices#import busioimport displayioimport adafruit_displayio_ssd1306 as ssd1306displayio.release_displays()i2c = busio.I2C(board.GP9, board.GP8)i2c.try_lock()i2c.scan()i2c.unlock()display_bus = displayio.I2CDisplay(i2c, device_address=60)display = ssd1306.SSD1306(display_bus, width=128, height=32)import asynciointerval_addition = 0.0async def blink(pin, interval):with digitalio.DigitalInOut(pin) as led:led.switch_to_output(value=False)while True:led.value = Trueawait asyncio.sleep(interval)led.value = Falseawait asyncio.sleep(interval + interval_addition)import rotaryio# SW - GP18 - push button# DT - GP19 - direction# CLK - GP20 - pulse out#async def rotary_encoder():global interval_additionencoder = rotaryio.IncrementalEncoder(board.GP20, board.GP19, 4)last_position = 0.0while True:position = encoder.positionif position != last_position and position >= 0:print(f"Off delay: + {position/10} sec")if position > last_position:interval_addition += 0.1else:interval_addition -= 0.1last_position = positionawait asyncio.sleep(0)import keypadasync def rotary_encoder_push(pin):with keypad.Keys((pin,), value_when_pressed = False) as keys:while True:event = keys.events.get()if event:if event.pressed:print("Rotary encoder pushed")elif event.released:print("Rotary encoder released")await asyncio.sleep(0)async def main():led1_task = asyncio.create_task(blink(board.GP16, 0.2))led2_task = asyncio.create_task(blink(board.GP17, 0.1))roto_task = asyncio.create_task(rotary_encoder())push_task = asyncio.create_task(rotary_encoder_push(board.GP18))await asyncio.gather(led1_task, led2_task, roto_task, push_task)asyncio.run(main())Preamble Code
Lines 9 through 49 document the Pico W’s environment, which is how much memory and flash storage, and the WiFi environment. It’s the WiFi environment check I want to draw attention to in particular. It’s more robust than just about every other example on the web. It turned out that for whatever reason the call to wifi.radio.start_scanning_networks() returns duplicate entries and entries in which the SSID is full of nulls. I used a Python dictionary to eliminate duplicates and a character test to see if the first character of the SSID isn’t a null. The resultant dictionary is sorted by the dictionary keys (SSID), which makes the printing of local SSID access point names easier to read.
Checking for I2C Devices
Lines 51 through 61 dig deeper into the Pico W’s environment, in this case any devices attached via the I2C bus.
Asyncio
The last section of the code, lines 66 to 140, are the interesting parts. Line 66 imports the asyncio library, which we’ll use throughout the remaining code listing. Lines 70, 86, and 103 use the async keyword before the function definition to mark these functions as using concurrency, instead of threads, for multitasking. All the sleep(..) functions are now written as await asyncio.sleep(...) to work with the concurrency framework. Failure to use regular sleep instead of asyncio’s sleep will cause only the first function called to execute. Behind the scenes, asyncio’s sleep yields to allow any other scheduled concurrent threads to execute. Even a call with ‘0’ will yield, and return almost immediately after.
Lines 114 to 121 set up the running of the tasks. The way the tasks are written, none of them actually return, which means everything works as it’s intended to, which is all the time.
Oddball Problem
I have a small 128×32, 16 character by 4 line LCD display attached via I2C. For the longest time the code would fault at line 58 at startup, saying that pin GP9 was already being used, which was perplexing as hell as that was the first place in the code it was referenced. I finally found, in another forum post about another problem, the line at 57, which temporarily releases the display and thus the pin to be defined at line 58. Even more bazaar is that the I2C device scan returns nothing.
Finally, the print line at 93 shows up on the LCD display even though I don’t explicitly do that. The LCD display is echoing what goes out on the REPL all on its own. It’s as if CircuitPython, behind the scenes, is scanning and finding that LCD display and then using it without me setting it up that way. I have never encountered this kind of behavior before, either with earlier CircuitPython releases or anything from MicroPython, either.


You must be logged in to post a comment.