
Unlike many, I do not move all my macOS settings from machine to machine unless the new machine is a complete replacement for the old machine and the old machine is on its last legs. I’ve done that exactly once, from my 2015 MBP to the 2019 MBP. After that transfer I spent a fair amount of time weeding out items that did not make sense on the new machine as well as items that were a good idea at the time, but time later proved to be a bad choice.
I made the decision after that one full transfer between MBPs to carefully curate all software before installing anything on the new machine. One of the choices I tried on the older MBP was Powerline. It didn’t work, and I almost skipped it entirely on the new MBP, but I decided to install it anyway and try once more to make it work.
I’ve been using Powerline on my Linux systems for some number of years now. I like what it does and how it looks and I try to install it anywhere I have a terminal and a command line prompt. It’s a bit counter-intuitive to want to have a sophisticated command line and terminal on a computer with a graphical user interface, but I keep a terminal environment active because I have decades of CLI experience that has served me admirably (once I was properly trained on how to use it). This post documents how I finally figured it out and what I did to get it to work. And it does work, both on the command line as well as within vi/vim.
Initial Environment
This machine has the following pre-installed:
- macOS 14.2.1 Sonoma
- zsh 5.9 (x86_64-apple-darwin23.0)
- python 3.9.6
This is all you really need to get started. A lot of how-tos (all of them old to very old) insist you install Homebrew (brew), and then via the brew command install zsh. The version of zsh Apple currently uses is the latest stable release, a far cry from the ancient version of bash it used to use.
Installation
Installation needs three main pieces; iTerm2, the Nerd Hack font and the Powerline status software itself.
iTerm2 can be downloaded from here: https://iterm2.com. Once downloaded, unzip the downloaded file and start the binary. Once running, iTerm2 will pick up and use zsh and it will automagically ask you if you want to move iTerm2 into the Application folder of you Mac. Select yes when asked. From that point iTerm2 can be selected via Launchpad, and once launched, you can right click the resultant icon in the Dock and chose to have it stay in the Dock (right click | Options | Keep in Dock).
The font I installed is Hack and can be found here: https://github.com/ryanoasis/nerd-fonts/releases . Download Hack.zip and unzip it, then use Apple’s Font Book utility to install the fonts.
 Not all of them will install due to issues with certain fonts, and rather than hassle with trying to resolve those issues I chose to skip them. Skipping the problematic fonts still allowed the fonts I needed to get installed, so no problems there.
Once the fonts are installed, open iTerm2’s Preferences and go to Profiles.

Select Hack NF as the Font, Regular weight. I chose to use a 15 point font size because the size of the 16″ display makes reading 15 point text in iTerm2 very easy. Even at 15 points a lot of text can still be seen in the terminal window.
With the terminal and font set up, install the Python package powerline-status using pip: pip3 install powerline-status.
Once installed execute the following command:
$ pip3 show powerline-statusName: powerline-statusVersion: 2.7Summary: The ultimate statusline/prompt utility.Home-page: https://github.com/powerline/powerlineAuthor: Kim SilkebaekkenAuthor-email: kim.silkebaekken+vim@gmail.comLicense: MITLocation: /Users/wbeebe/Library/Python/3.9/lib/python/site-packagesRequires:Required-by:
The line we’re interested in is the Location at line 9 in the listing. In this example, because I’m not running as root, the package is installed locally in my home directory, which it should be. Every home directory has a $HOME/Library directory. It’s underneath site-packages that you’ll find the site package for powerline. Here’s what we are looking for specifically:
$ ls -AlFh Library/Python/3.9/lib/python/site-packages/powerline/bindingstotal 24-rw-r--r-- 1 wbeebe staff 0B Dec 29 15:32 __init__.pydrwxr-xr-x 3 wbeebe staff96B Dec 29 17:03 __pycache__/drwxr-xr-x 4 wbeebe staff 128B Dec 29 15:32 awesome/drwxr-xr-x 3 wbeebe staff96B Dec 29 15:32 bar/drwxr-xr-x 3 wbeebe staff96B Dec 29 15:32 bash/-rw-r--r-- 1 wbeebe staff 9.8K Dec 29 15:32 config.pydrwxr-xr-x 3 wbeebe staff96B Dec 29 15:32 fish/drwxr-xr-x 3 wbeebe staff96B Dec 29 15:32 i3/drwxr-xr-x 6 wbeebe staff 192B Dec 29 15:32 ipython/drwxr-xr-x 3 wbeebe staff96B Dec 29 15:32 lemonbar/drwxr-xr-x 4 wbeebe staff 128B Dec 29 15:32 pdb/drwxr-xr-x 4 wbeebe staff 128B Dec 29 15:32 qtile/drwxr-xr-x 3 wbeebe staff96B Dec 29 15:32 rc/drwxr-xr-x 3 wbeebe staff96B Dec 29 15:32 shell/drwxr-xr-x 3 wbeebe staff96B Dec 29 15:32 tcsh/drwxr-xr-x 11 wbeebe staff 352B Dec 29 15:32 tmux/drwxr-xr-x 6 wbeebe staff 192B Dec 29 17:03 vim/drwxr-xr-x 4 wbeebe staff 128B Dec 29 15:32 wm/drwxr-xr-x 4 wbeebe staff 128B Dec 29 15:32 zsh/
The two folders we’re interested in are line 19 (vim) and line 21 (zsh). Since we’re interested in zsh, let’s concentrate on that for the moment.
Underneath the zsh folder is one file we need:
ls -AlFh Library/Python/3.9/lib/python/site-packages/powerline/bindings/zshtotal 32-rw-r--r-- 1 wbeebe staff 5.4K Dec 29 15:32 __init__.py-rw-r--r-- 1 wbeebe staff 6.5K Dec 29 15:32 powerline.zsh
The file powerline.zsh is sourced inside the .zshrc file. But before we add this to our .zshrc file, we need to make one more change for the powerline script to execute. At the same level as the lib (library) folder is a bin (binary) folder. Here’s what that folder holds:
$ ls -AlFh Library/Python/3.9/bintotal 160-rwxr-xr-x 1 wbeebe staff 263B Dec 29 15:32 pip*-rwxr-xr-x 1 wbeebe staff 263B Dec 29 15:32 pip3*-rwxr-xr-x 1 wbeebe staff 263B Dec 29 15:32 pip3.11*-rwxr-xr-x 1 wbeebe staff 263B Dec 29 15:32 pip3.9*-rwxr-xr-x 1 wbeebe staff34K Dec 29 15:32 powerline*-rwxr-xr-x 1 wbeebe staff 624B Dec 29 15:32 powerline-config*-rwxr-xr-x 1 wbeebe staff13K Dec 29 15:32 powerline-daemon*-rwxr-xr-x 1 wbeebe staff 385B Dec 29 15:32 powerline-lint*-rwxr-xr-x 1 wbeebe staff 928B Dec 29 15:32 powerline-render*
You need all the highlighted files for Powerline to work properly. For that, you’ll need to add the path to bin to your full path in .zshrc, for example;
export PATH=$PATH:$HOME/Library/Python/3.9/bin
before you add the following line to .zshrc;
source $HOME/Library/Python/3.9/lib/python/site-packages/powerline/bindings/zsh/powerline.zsh
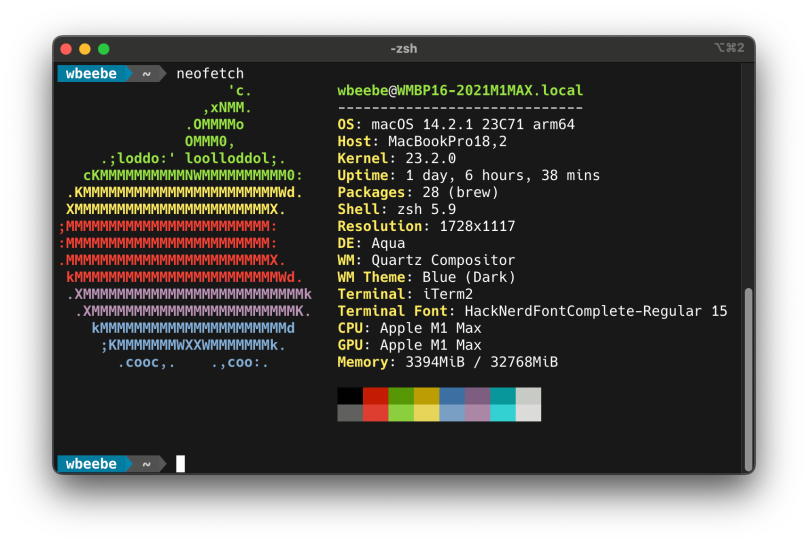
Once all of that is completed then you should at least get the colorful powerline prompt as seen in the screen capture at the top of this post.
vi/vim Setup
First the bad news. The version of vi/vim supplied by Apple wasn’t built to support Python scripting, and you need that support for this to work. The good news is you can get a version that works, but you’ll have to install Homebrew and then use Homebrew to install that version of Python. First, go to the Brew site ( https://brew.sh ) and follow their directions to install it. Once installed you can install the “proper” vi/vim that will support Python scripting. Please note that you’ll need to add the location where Homebrew installs binaries (/opt/homebrew/bin) to your path in order to execute them. And this should be at the start of path, not the end, otherwise you’ll keep executing Apple’s version instead of the version installed by Homebrew.
For vi/vim, you need to add the following to your .vimrc configuration file;
set rtp+=$HOME/Library/Python/3.9/lib/python/site-packages/powerline/bindings/vimset laststatus=2set t_Co=256
Once that’s in your vi configuration file, the status line should look like the following:

There’s a lot more going on inside my vi config file, but the last three lines enable the bottom status line, and that’s what’s important here.

You must be logged in to post a comment.